How to sharpen kitchen knives (the right way)
A dull knife demands three to four times more force than a sharp one, which makes it unpredictable. Learn when to hone, when to sharpen, and how to use a whetstone, electric sharpener, or honing rod to keep every blade in your kitchen performing at its best.
You grab your chef's knife, line it up against a ripe tomato, and press down. Instead of slicing clean, the blade crushes the skin and slides sideways. Juice everywhere. That's not a knife problem, it's a sharpness problem.
A dull knife demands three to four times more force than a sharp one, which makes it unpredictable. The blade slips off food instead of cutting through it. More force, less control, and that's how most kitchen cuts happen.
The fix isn't buying a new knife. It's learning how to sharpen kitchen knives properly. Whether you use a whetstone, an electric sharpener, or a honing rod, the right method depends on your knives, your budget, and how much time you're willing to spend.
Honing vs sharpening: they're not the same thing
Most home cooks reach for a honing steel when their knife feels dull. That's the right first move, but it's not sharpening.
Honing realigns the edge of your blade. Through normal use, the thin metal at the cutting edge bends and folds microscopically. A honing rod (that long, textured steel that came with your knife block) straightens those micro-bends back into alignment. No metal is removed. The edge you have is simply straightened.
Sharpening removes metal to create a brand new edge. When honing stops restoring your knife's performance, the edge has worn down beyond what realignment can fix. That's when you sharpen.
Think of it this way: honing is like combing your hair back into place. Sharpening is like getting a haircut.
Here's the practical rule: hone your knife every two to three uses. Sharpen it two to four times per year, depending on how often you cook and what you're cutting.
A quality honing rod costs $15-30 and takes 30 seconds to use. That one habit alone extends the time between sharpenings dramatically. If you're reaching for the whetstone every month, you're probably skipping the honing rod.
How to tell when your knife actually needs sharpening
Before pulling out the whetstone, run these quick tests. Your knife might just need honing.
The paper test. Hold a single sheet of printer paper by its edge and draw the knife downward through it. A sharp knife slices through cleanly. A dull knife snags, tears, or deflects to one side. If the blade catches at one spot but cuts cleanly elsewhere, you have a dead spot on the edge.
The tomato test. Place a ripe tomato on your cutting board, rest the blade on the skin without any downward pressure, and draw toward you. A sharp knife bites into the skin under its own weight. A dull knife just slides.
The fingernail test. Carefully rest the blade's edge on your thumbnail at a slight angle. A sharp edge catches and grips the nail right away. A dull edge slides off.
If honing doesn't fix the paper test, it's time to sharpen.
Sharpening methods compared
Not every knife needs a whetstone, and not every cook has 20 minutes to spare. Here's an honest look at your options.
| Method | Cost | Skill level | Edge quality | Time | Best for |
|---|---|---|---|---|---|
| Whetstone | $25-80 | Moderate | Excellent | 15-20 min | Quality knives, best results |
| Electric sharpener | $30-150 | Easy | Good | 2-3 min | Convenience, consistent angles |
| Pull-through manual | $10-30 | Easy | Fair | 1 min | Cheap knives, quick touch-ups |
| Honing rod | $15-30 | Easy | N/A (maintenance) | 30 sec | Between sharpenings |
| Professional service | $5-10/knife | None | Excellent | Days | Damaged or expensive knives |
Whetstones give you the most control and the best edge, but they take practice. Most home cooks can learn the basics in one or two sessions.
Electric sharpeners are consistent and fast. Good models maintain a preset angle. They do remove more metal than a whetstone, shortening knife lifespan slightly over decades of use, but for most home cooks, that trade-off is invisible.
Pull-through sharpeners are the most controversial. The knife community largely advises against using them on quality knives (anything over $50) because they remove metal aggressively and at a fixed angle that may not match your knife's original bevel. But for a $15 paring knife? They're fine.
Professional sharpening makes sense for badly damaged edges, expensive Japanese knives you're not comfortable sharpening yourself, or serrated blades. Many farmers markets and kitchen stores offer this service.
How to sharpen kitchen knives with a honing rod
Before reaching for a whetstone, learn how to sharpen kitchen knives with a rod. This is the single most impactful knife maintenance habit, and it takes 30 seconds.
I used to skip the honing rod entirely. My knives would go from sharp to useless in a few weeks, and I'd end up at the whetstone way too often. Once I started honing every second or third cooking session, the difference was immediate: my chef's knife held its edge for months instead of weeks.
Pressure matters. Use light pressure, about the weight of your hand resting naturally. The rod isn't grinding metal; it's nudging microscopic bends back into alignment.
Tip: A ceramic honing rod removes a tiny amount of metal and works well for knives that are slightly past the point where a steel rod helps. It sits between honing and full sharpening.
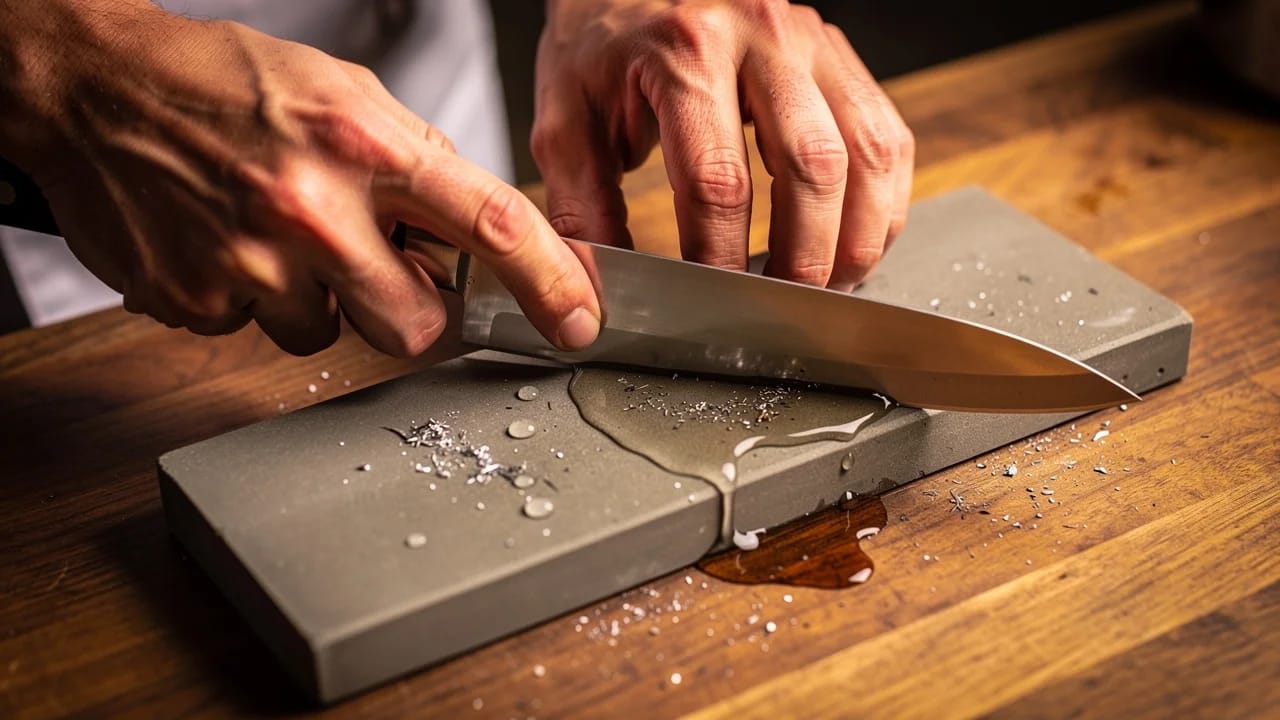
How to sharpen kitchen knives with a whetstone
Sharpening a knife with a stone gives you more control than any other method. Professional cooks use whetstones for a reason: nothing else produces this quality of edge. And it's simpler than it looks.
What you need
- A combination whetstone (1000/6000 grit). The King KDS 1000/6000 or Shapton Pro 1000 are solid starting points
- A towel or non-slip base
- A Sharpie marker
- Water (for soaking and splashing)
One stone is enough. A single 1000 grit stone handles 90% of knife sharpening. Add a 6000 grit side for polishing, and you're covered.
Step 1: Soak the stone
Submerge your whetstone in water for 10-15 minutes until bubbles stop rising. This creates the slurry, a thin paste of water and stone particles, that does the actual cutting. Splash water on the surface periodically while sharpening to keep the slurry active.
Place the stone on a damp towel or a silicone base to prevent slipping. Start with the coarse side (1000 grit) facing up.
Step 2: Find your angle
This is where most beginners struggle. Here's the trick that makes all the difference: the marker method.
Take a Sharpie and color the entire bevel, that angled strip of metal right at the cutting edge. Make a few passes on the stone, then check the ink. If the ink is removed evenly across the bevel, your angle is correct. If only the top of the bevel loses ink, you're too steep. If only the bottom, you're too shallow.
For most Western kitchen knives (Wusthof, Henckels, Victorinox), hold the blade at 20 degrees to the stone. For Japanese knives (Shun, Global, MAC), use 15 degrees.
Getting the knife sharpening angle right doesn't require a protractor. Lay the knife flat on the stone (0 degrees), tilt it to 45 degrees, then halve that to roughly 22 degrees. Drop it just slightly. That's close enough. Perfection matters less than consistency.
Step 3: Sharpen with even strokes
Place your fingertips on the flat side of the blade near the edge, directly above the section you're sharpening. Apply moderate pressure, about the weight of a can of beans pressing down.
Push the blade away from you in a smooth arc, covering the entire edge from heel to tip. Or pull it toward you. Either direction works. What matters is that each stroke covers the full length of the edge.
Start with 10 strokes on one side. You're looking for one specific thing: a burr.
Step 4: Feel for the burr
After 10-15 strokes, run your finger from the spine toward the edge on the opposite side of the blade. You should feel a tiny rough ridge, a thin wire of metal pushed to the other side. That's the burr.
The burr tells you the two bevels have met and a new edge has formed. If you can't feel it, keep sharpening the same side until you can.
Once you feel the burr along the entire edge, flip the knife and repeat on the other side until a burr forms there too.
Step 5: Refine on fine grit
Flip the stone to the 6000 grit side. Make 5-10 light passes per side with reduced pressure, half of what you used on the coarse stone. This polishes the edge and removes the burr, leaving a clean, refined cutting surface.
Step 6: Strop and test
No leather strop? No problem. Drag the edge backward (spine first) along a piece of cardboard or folded newspaper, alternating sides, 5-10 times. This removes any remaining burr and polishes the edge further.
Now run the paper test. A properly sharpened knife will slice through printer paper silently.
Sharpening angles by knife type
The angle determines how sharp and how durable your edge will be. Lower angles produce sharper edges that dull faster. Higher angles are less razor-sharp but hold up longer.
| Knife type | Angle per side | Total edge angle | Notes |
|---|---|---|---|
| Japanese chef's (gyuto, santoku) | 15 degrees | 30 degrees | Harder steel, thinner edge |
| Western chef's (German-style) | 20 degrees | 40 degrees | Softer steel, more durable |
| Chinese cleaver (vegetable) | 15-18 degrees | 30-36 degrees | Thin blade, precise work |
| Chinese cleaver (meat) | 25 degrees | 50 degrees | Heavier duty, bone-capable |
| Paring knife | 15-20 degrees | 30-40 degrees | Match your chef's knife angle |
| Bread knife (serrated) | Don't sharpen at home | — | Professional or replace |
Important: single-bevel Japanese knives (like a yanagiba or usuba) are sharpened on one side only, typically at 10-15 degrees. If you own one, that's a specialized skill. Start with a professional sharpener.
Common sharpening mistakes
Inconsistent angle. Your angle drifts as you stroke, creating a rounded bevel instead of a flat one. Use the Sharpie trick on every session until muscle memory develops. Some companies also sell angle guides that clip onto the blade.
Too much pressure. Pressing hard doesn't sharpen faster. It gouges the stone and creates an uneven edge. The stone does the work. Apply the weight of a can of beans, nothing more.
Skipping honing between sharpenings. If you sharpen monthly but never hone, you're removing metal unnecessarily. A quick pass on the honing rod every two to three uses keeps the edge aligned and extends time between sharpenings by months.
Sharpening when you should be honing. If the paper test fails but the edge looks intact (no visible nicks or chips), try honing first. Sharpening is the last resort, not the first response.
Pull-through sharpeners on quality knives. They grind at a preset angle that likely doesn't match your knife's bevel. On a $200 knife, that's an expensive mistake. Save them for utility knives.
Forgetting to flatten the stone. Whetstones dish (develop a concave surface) over time. A dished stone creates a convex bevel on your knife. Flatten yours with a diamond lapping plate or by rubbing it on wet sandpaper (200 grit) laid on a flat surface. Do this every 5-10 sessions.
How often should you sharpen your knives?
It depends entirely on how much you cook.
- Daily cook (dinner most nights): sharpen every 3-4 months, hone every 2-3 uses
- Frequent cook (4-5 times per week): sharpen every 4-6 months, hone regularly
- Occasional cook (2-3 times per week): sharpen once or twice a year, hone when it feels off
These timelines assume you're honing regularly. Without honing, you'll need to sharpen twice as often and remove twice as much metal each time.
The paper test is your best guide. When honing stops restoring performance and the paper test fails, it's time. Think of it like seasoning cast iron: a little regular maintenance prevents a lot of corrective work.
FAQ
Can you ruin a knife by sharpening it wrong?
Not permanently, but you can create problems. Sharpening at the wrong angle creates a mismatched bevel that cuts unevenly. Excessive pressure can remove too much metal. Both are fixable, a professional sharpener can restore almost any edge. The exception: serrated knives sharpened flat lose their serrations permanently.
Are pull-through sharpeners bad for knives?
For quality knives (over $50), yes. They remove metal aggressively and at a fixed angle. For inexpensive utility knives, they're practical and fast. Match the sharpener to the knife's value.
Should you sharpen serrated knives?
Most home cooks shouldn't try. Serrated edges require sharpening each individual scallop with a tapered rod. A professional service handles this better. Alternatively, high-quality serrated knives (like Victorinox bread knives) are affordable enough to replace every few years.
How long does whetstone sharpening take?
About 15-20 minutes per knife once you're comfortable with the technique. Your first few sessions will take 30-45 minutes as you learn angle control and burr detection. With practice, sharpening a chef's knife takes under 10 minutes.
What grit whetstone should a beginner buy?
Start with a 1000/6000 combination stone. The 1000 grit side handles all your sharpening work, and the 6000 grit polishes the edge after. I tried starting with a single 1000 grit stone and it worked fine for the first year, but the polishing step with 6000 grit makes a noticeable difference in how long the edge lasts. The King KDS 1000/6000 is a reliable budget pick.
How to sharpen kitchen knives at home without a whetstone?
If you don't have a whetstone, an electric sharpener is the next best option for sharpening kitchen knives at home. Good models from Chef'sChoice or Work Sharp maintain a consistent angle and take 2-3 minutes per knife. For a quick fix, even the unglazed bottom of a ceramic mug can work in a pinch. Run the blade across the rough ring at a 20-degree angle, 10 strokes per side. I've used this trick while traveling and it genuinely works for a temporary edge.
Keep your knives sharp, keep your cooking sharp
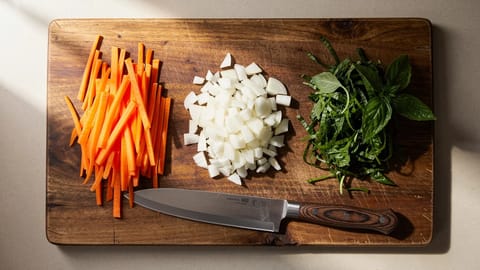
There's a real difference between cooking with a sharp knife and fighting a dull one. Your onion dice comes out clean instead of ragged. Herbs get sliced instead of bruised. Prep takes half the time when you're not wrestling with your tools.
Start simple: get a 1000/6000 combination whetstone and practice on the cheapest knife in your drawer. Use the Sharpie trick to find your angle. Form the burr, flip, repeat. Within two or three sessions, you'll have the muscle memory down.
Between sharpenings, reach for the honing rod. It's the single best habit for knife maintenance. And once your knives are sharp, put them to work: our knife cuts guide breaks down every cut from brunoise to chiffonade, with dimensions and techniques for each. Sharp knives and solid prep habits go hand in hand.
Good prep starts with sharp tools. The rest is practice.
Sources

Cook smarter
Join the waitlist for Fond. Recipes, meal plans, and a little AI sous-chef that learns how you cook.
Related articles
How to season a cast iron skillet: the complete guide
Seasoning is what makes cast iron nonstick, rust-proof, and better with every use. Learn the oven method, stovetop method, best oils for seasoning, and how to fix common problems like sticky residue, flaking, and rust.
Types of knife cuts: the complete guide for home cooks
Professional chefs learn 12+ standard knife cuts in culinary school. Home cooks usually learn zero. That gap shows up on the plate — in uneven cooking, mushy textures, and dishes that never quite look like the recipe photo.
What is mise en place and why it matters
Mise en place is the practice of preparing and organizing every ingredient and tool before you start cooking. It's the single habit that separates chaotic, stressful cooking from calm, confident meals, and it works just as well in a home kitchen as it does in a professional one.