Pizza dough hydration: complete guide to water ratios
How the water-to-flour ratio shapes your crust. 60% gives you a stiff, easy-to-handle dough; 75%+ gives you open, airy crumb but requires more technique. Includes baker's percentages by style, a decision framework, bassinage technique, and fermentation interaction.
TL;DR: Hydration is the water-to-flour ratio in your dough, expressed as a baker's percentage. For most home bakers, 60-65% hydration is the sweet spot -- easy to handle and producing great texture. Reserve higher hydration (75%+) for pan styles like Detroit or Roman al Taglio, and always match hydration to your flour's protein content and oven temperature.
What is pizza dough hydration?
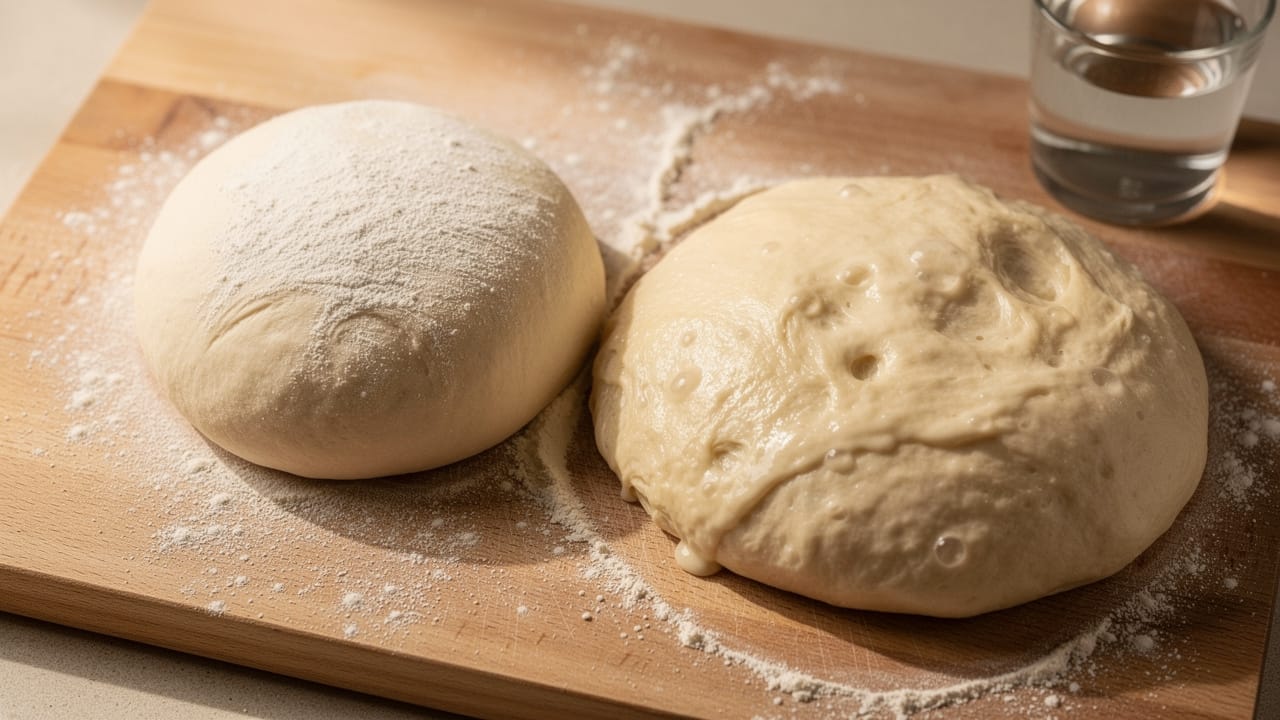
Hydration is the ratio of water to flour in your pizza dough, expressed as a percentage. This measurement, called baker's percentage, is how bakers talk about and control dough behavior. A 65% hydration dough means you're using 65 grams of water for every 100 grams of flour. Use our pizza dough calculator to compute exact water weights for any batch size.
Pizza dough hydration directly affects your dough's texture, extensibility, oven spring, and final crust. Different pizza styles need different hydration levels, and even a 5% change can shift the result noticeably.
Hydration levels by pizza style
| Pizza Style | Hydration Range | Typical Hydration | Crust Characteristics |
|---|---|---|---|
| Neapolitan | 60-65% | 62-63% | Soft, chewy, leopard spotting |
| New York Style | 58-62% | 60% | Foldable, crispy bottom, chewy |
| Detroit Style | 70-75% | 72% | Airy, crispy edges, soft interior |
| Roman al Taglio | 75-85% | 80% | Light, airy, large holes |
| Sicilian | 65-70% | 67% | Thick, fluffy, breadlike |
| Thin Crust | 50-55% | 52% | Cracker-crisp, sturdy |
Choosing your hydration: a decision framework
Most hydration guides say "it depends" and leave you there. Here's a concrete starting point based on your actual situation:
| Oven max temp | Flour type | Experience level | Start here |
|---|---|---|---|
| 450°C+ (wood-fired) | 00 flour (W300+) | Any | 62-65% |
| 300-450°C (pizza oven) | 00 or bread flour | Intermediate | 62-65% |
| 250°C (home oven, baking steel) | Bread flour (13%+) | Intermediate | 60-63% |
| 250°C (home oven, baking steel) | All-purpose (11%) | Beginner | 58-62% |
| 250°C (home oven, no steel) | Any | Beginner | 56-60% |
| Any | Any (pan pizza) | Any | 70-80% |
The key insight: your oven temperature constrains your hydration more than anything else. Neapolitan dough at 62% works because the crust bakes in 60-90 seconds at 450°C -- the steam escapes fast enough to crisp the exterior before the inside gums up. In a home oven at 250°C, that same dough takes 7-10 minutes. Too long at lower heat with too much moisture means a pale, gummy undercarriage regardless of how well you mixed the dough.
Note: These are starting points, not rules. Once you've baked a dough three times at a given hydration and understand how it behaves, adjust by 2-3% in either direction.
The sweet spot: what works
60-70% hydration is the sweet spot for pizza. Higher hydration numbers sound impressive, and you'll see plenty of people online bragging about 80%+ doughs, but above 70% the dough becomes unmanageable for most home bakers. You end up with free-form pizzas that stick to every surface and frustrate you into ordering delivery. Reserve 75%+ for pan styles only (Detroit, Sicilian, focaccia) where the pan does the shaping work.
Tip: If you're starting out, try a 62% hydration dough and bake it three times before changing anything. Consistency teaches you more than chasing higher numbers.
How hydration affects your dough
Lower hydration (50-60%)
- Easier to handle and shape
- Denser, more bread-like crumb
- Less oven spring
- Crispier, sturdier crust
- Shorter mixing and fermentation time
Medium hydration (60-70%)
- Balanced workability and texture
- Good for beginners
- Moderate oven spring
- Chewy yet crispy crust
- Works in most home ovens
High hydration (70-85%)
- Hard to handle without experience
- Open, airy crumb with large holes
- Maximum oven spring
- Light, crispy exterior with soft interior
- Requires extended mixing or folding
- Benefits from cold fermentation
- Needs a hot oven for best results
- Warning: Above 70%, the dough sticks to everything and won't hold a round shape on a peel. Start at 62% and work up gradually over many bakes — high-hydration doughs handle differently from what most recipes suggest.
A counter-intuitive fact: Higher hydration creates a crispier exterior, not sogginess. The extra water generates more steam during baking, pushing outward to create bubbles and a thin, crackling shell. If your high-hydration pizza comes out soggy, you under-baked it or your oven wasn't hot enough. The hydration level isn't the problem.
Hydration vs. flavor: A common mistake is thinking higher hydration means better-tasting pizza. It doesn't. Hydration affects workability and texture far more than flavor.
Flavor comes primarily from fermentation time and technique, salt ratios, and flour quality. A well-fermented 60% dough will taste vastly better than a poorly fermented 80% dough.
Hydration and fermentation: how they interact
Hydration and fermentation affect each other directly, and this is where most intermediate bakers get tripped up.
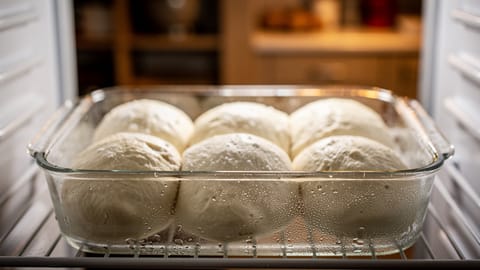
Cold fermentation (48-72 hours)
A long cold ferment changes how your dough handles at any hydration level. Extended enzymatic activity breaks down gluten slightly, making the dough more extensible and relaxed. This means:
- A 63% cold-fermented dough handles more like a 65-66% same-day dough
- High-hydration doughs (70%+) become even slacker after 72 hours cold -- plan accordingly
- The dough needs a longer bench warm-up (60-90 minutes out of the fridge) before shaping, or it'll tear
Over-fermentation at high hydration
This is the failure mode nobody warns you about. At high hydration (70%+), the gluten network is already under more stress. If you over-ferment -- too warm, too long, or too much yeast -- the gluten breaks down faster than at lower hydration. Signs: the dough spreads immediately when you try to shape it, feels almost liquid, and has a sour or alcoholic smell beyond normal tang. It won't hold a shape and will produce a flat, dense pizza.
Warning: If you're doing a 72-hour cold ferment, reduce your yeast by 30-40% compared to a same-day recipe, especially at hydrations above 65%.
Same-day vs. cold ferment starting point
| Fermentation | Recommended starting hydration |
|---|---|
| Same-day (4-6 hours, room temp) | 60-63% |
| Overnight (12-16 hours, cold) | 62-65% |
| 48-72 hours (cold) | 60-65% (dough relaxes significantly) |
| Sourdough (natural leavening) | 62-68% (starter adds hydration) |
Note on sourdough: your starter contributes water to the total. A 100% hydration starter at 20% inoculation adds roughly 10g water per 100g flour -- effectively 10% extra hydration you need to account for in your calculation.
Bassinage: adding water incrementally
Bassinage is a French mixing technique where you hold back 5-10% of your total water and add it gradually at the end of mixing once the dough has come together. It's one of the most practical skills for home bakers working with higher hydration.
Here's why it works: flour absorbs water unevenly at the start of mixing. If you dump all the water in at once, some flour gets oversaturated before it's had time to hydrate properly, making the dough feel wetter and stickier than its actual hydration suggests. By letting the dough develop structure first, then incorporating the remaining water slowly, you get better gluten development and a more manageable dough.
How to do it:
Bassinage is especially useful when jumping up in hydration (say, from 62% to 67%), when working with a new bag of flour that may absorb differently, or when your kitchen is warm and the dough is developing faster than expected.
Tip: Reserve about 5% of your water for bassinage as a default. If the dough absorbs it easily and still feels firm, you can go slightly above your target. If it starts to look shaggy or break apart, stop early.
Working with high-hydration dough
Mixing and development
Use the stretch and fold method instead of traditional kneading. Do 4-6 sets of folds over 2-3 hours, letting the dough rest 30 minutes between sets. This builds gluten without overworking the dough.
Handling techniques
- Keep your hands and work surface lightly oiled rather than floured
- Use a bench scraper to lift and move the dough
- Work quickly and confidently
- Avoid excessive handling
- Use the "windowpane test" to check gluten development
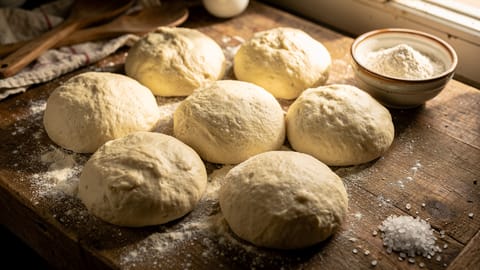
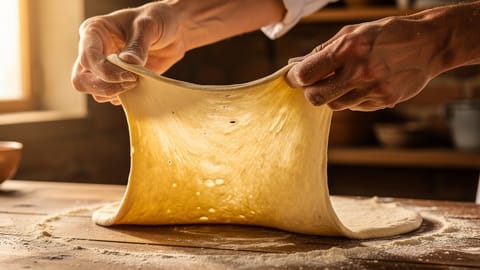
Shaping high-hydration dough
- Pre-shape into rounds and allow 20-30 minutes bench rest
- Use generous flour or semolina on your peel
- Stretch gently from the center outward
- Don't use a rolling pin -- it destroys the air structure
- Work on parchment paper for easier transfer
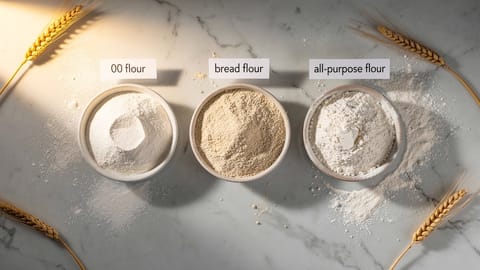
Adjusting hydration for flour type
Different flours absorb water at different rates. See our pizza flour guide for a deeper dive. Here's how protein content changes things:
High-protein flour (13-14% protein)
- Absorbs more water
- Can handle 65-80% hydration
- Develops a strong gluten network
- Ideal for high-hydration styles like Roman al Taglio
Medium-protein flour (11-12% protein)
- Moderate absorption
- Works well at 60-70% hydration
- Good balance of strength and extensibility
Low-protein flour (9-10% protein)
- Absorbs less water
- Best at 55-65% hydration
- Produces a tender, delicate crust
- Good for thin-crust styles
00 flour
- Fine grind absorbs water differently
- Needs 2-3% less hydration than bread flour at the same feel
- Creates silky, smooth dough
- Traditional for Neapolitan pizza
Environmental adjustments: humidity and altitude
Humidity
Flour absorbs moisture from the air. In a humid environment, your flour is already partially hydrated before you add any water.
| Relative humidity | Adjustment |
|---|---|
| Below 40% (dry climate, winter heating) | Add 2-3% hydration |
| 40-60% (ideal) | No adjustment needed |
| 60-75% (humid summer) | Reduce by 2-3% |
| Above 75% (very humid) | Reduce by 3-5%, keep dough cold |
If you're baking in peak summer humidity (above 75%), your 63% recipe effectively behaves like a 66-68% dough. This is why dough that works perfectly in January feels like wet cement in August -- the recipe hasn't changed, but the effective hydration has.
Altitude
At higher altitude (above 1500m / 5000ft), water evaporates faster during baking and dough ferments more quickly. Two adjustments:
- Increase hydration by 2-3% to compensate for faster moisture loss during baking
- Reduce yeast by 20-25% to slow fermentation, which runs faster at altitude due to lower atmospheric pressure
Note: Altitude affects fermentation speed more than hydration feel. The hydration adjustment compensates for faster evaporation in the oven, not because your dough will feel different during mixing.
Tips for hydration success
Start low, go slow: Begin with lower hydration and increase gradually as you get comfortable handling the dough.
Temperature matters: Water temperature affects absorption. Use cooler water (55-65°F / 13-18°C) for longer fermentation, warmer water (75-85°F / 24-29°C) for faster development.
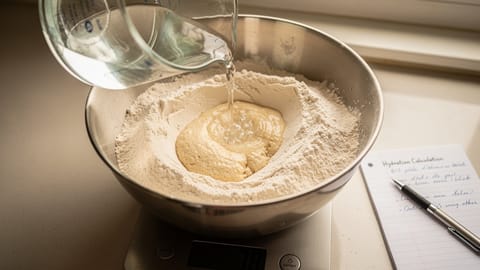
Autolyse technique: Mix flour and water only, then rest for 30 minutes to 8 hours before adding yeast and salt. This pre-soak lets the flour fully absorb water, improving crumb structure and extensibility. Even 30 minutes makes a noticeable difference.
A longer autolyse (4-8 hours, refrigerated) produces remarkably smooth, extensible dough that practically shapes itself. Keep salt and yeast out during the autolyse -- salt tightens gluten prematurely and yeast starts fermenting before the flour is ready.
Tip: Weigh your water with a kitchen scale instead of measuring cups. At higher hydration levels, even 10 grams of extra water can noticeably change how the dough handles.
Keep notes: Record your hydration levels and results. Every flour behaves differently, and your ideal hydration is ultimately a personal preference.
Troubleshooting common hydration issues
Our dough troubleshooting guide covers the full range of problems. Here's a symptom-based map for hydration-related issues specifically:
Dough too sticky / won't stop sticking to everything
Usually one of three things: too much water, under-developed gluten, or a warm kitchen. Rule them out in order. If you're at 63% or below and it's still unmanageable, the problem is almost certainly gluten development (more folds, more rest) rather than hydration. If you're above 70%, this is normal -- oil your hands, use a bench scraper, and stop expecting it to behave like lower-hydration dough.
Dough too stiff / tears when you try to stretch it
Increase hydration by 2-3% next time. You can add small amounts of water during mixing, but it's hard to incorporate after bulk fermentation begins. Alternatively, let it rest longer before shaping -- a tight dough often needs more bench time to relax.
Pale, blond crust with no browning
Often blamed on oven temperature, but hydration is a contributing factor. Excess moisture suppresses Maillard browning. If you're above 68% and getting pale crusts in a home oven, try dropping to 63% before assuming you need a hotter oven. Also check that your oven is fully preheated (at least 45 minutes with a baking steel).
Dense crumb with no air pockets
Not a hydration problem -- this is almost always a fermentation or gluten development issue. Don't chase higher hydration thinking it will open the crumb. Fix your bulk ferment and folding technique first. An open crumb comes from trapped gas, not extra water.
Gummy, undercooked undercarriage
Classic home oven problem. The bottom crust looks pale and feels damp even after the top is nicely colored. Causes in rough order of likelihood:
- Oven not hot enough or not preheated long enough
- Dough stretched too thick
- Too much sauce or toppings
- Hydration too high for your oven's peak temperature
If you've ruled out 1-3, drop hydration by 3-5% and see if it resolves. This symptom is common when home bakers use recipes designed for 450°C+ ovens in a 250°C home oven -- the bake time is 5x longer and the moisture never fully escapes.
Dough spreads flat immediately when you try to shape it
This is over-fermentation, not a hydration issue. If your dough looked fine an hour ago but now puddles on the counter, it's gone too far. At high hydration, over-fermentation happens faster because more free water accelerates enzymatic activity. Prevention: use less yeast, keep fermentation cooler, and shape before the dough peaks rather than after.
Once you get a feel for pizza dough hydration, you stop following recipes blindly and start adjusting by touch. That's when pizza-making gets fun.
Frequently Asked Questions
Hydration is the ratio of water to flour by weight, expressed as a percentage. A dough made with 1000g flour and 650g water is 65% hydration. It's one of the most important variables in pizza making because it directly controls how the dough handles and bakes.
For most home bakers, 60–65% is the most practical range — the dough is strong enough to shape without tearing and doesn't stick aggressively to your hands or work surface. Higher hydrations (68–75%) produce a more open crumb and better blistering, but they require more experience to handle and shape correctly.
Traditional Neapolitan dough (per the AVPN standard) targets 55–62% hydration, which produces a tight, smooth dough that holds its shape through hand stretching. The dough's strength comes from long fermentation at room temperature, not high water content. Higher hydrations are used by some modern Neapolitan pizzerias, but they deviate from the classic style.
70% is manageable but noticeably stickier and harder to shape without experience. At that level, the dough benefits from slap-and-fold development and a well-floured bench during shaping. For beginners, the extra handling difficulty usually outweighs any texture gains — start lower and work up once you understand how the dough behaves.
Overly wet dough spreads and flattens on the peel instead of holding its shape, and it tends to stick, making a clean launch into the oven difficult. The crust can also bake up dense and gummy if the dough hasn't developed enough gluten structure to trap steam properly. High-hydration doughs require thorough mixing and folding to build that structure.
Home ovens top out around 260–280°C (500–550°F), which is significantly cooler than a wood-fired oven. At lower temperatures, a drier dough in the 62–65% range tends to perform better — it browns more evenly and crisps up before the center turns gummy. High-hydration doughs are optimized for fast, high-heat baking and can underperform in a standard oven.
Higher hydration speeds up fermentation because water makes sugars and enzymes more accessible to the yeast. A 70% hydration dough will typically proof faster than a 60% one at the same temperature with the same yeast quantity. When you increase hydration, it's worth reducing your yeast slightly or shortening bulk fermentation time to avoid over-proofing.

Cook smarter
Join the waitlist for Fond. Recipes, meal plans, and a little AI sous-chef that learns how you cook.
Related guides
Cold Fermentation Pizza Dough Guide
Slow-rise your dough in the fridge for 24, 48, or 72 hours. The longer it sits, the more complex the flavor gets. Most home bakers hit the sweet spot at 48 hours with 0.1% fresh yeast.
Neapolitan Pizza Dough
Neapolitan dough the way Naples does it: 00 flour, 60-62% hydration, long fermentation, and extreme heat. This guide follows AVPN standards and adapts them for home ovens, including flour brands, fermentation schedules, and a full troubleshooting section.
Pizza Dough Troubleshooting: Common Problems & Fixes
Dough too sticky? Won't stretch? Bland crust? Tearing during shaping? This guide covers the most common headaches and what's actually going wrong, with quick fixes you can try right now.
Pizza Flour Guide: 00, Bread Flour, AP & Protein Content
00 vs. bread flour vs. all-purpose: what actually matters is protein content and how it matches your pizza style. Includes W values, brand recommendations, and a style-to-flour matching table.
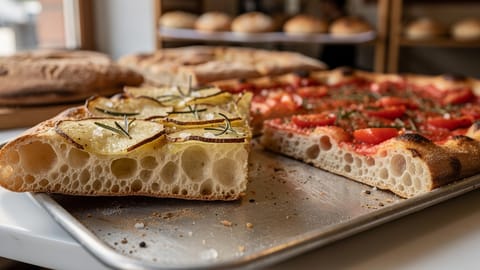
Roman pizza al taglio
Rome's iconic sheet pizza, sold by weight and eaten standing up. An ultra-light, airy crumb with a crispy bottom, made with poolish and ~80% hydration over 2-3 days.
Hydration (Bread)
The ratio of water to flour in bread dough, expressed as a percentage. Higher hydration means wetter, more open-crumb bread.

Baker's Percentage
A method of expressing bread recipe ingredients as percentages relative to the total flour weight, making recipes infinitely scalable.