Pizza Dough Troubleshooting: Common Problems & Fixes
Dough too sticky? Won't stretch? Bland crust? Tearing during shaping? This guide covers the most common headaches and what's actually going wrong, with quick fixes you can try right now.
TL;DR: Most pizza dough failures come down to hydration, fermentation timing, or gluten development. Sticky dough needs more folds or less water, tight dough needs more rest, and bland crust needs longer cold fermentation. Use the troubleshooting guide below for fast diagnosis.
Too much water for your flour, or gluten is under-developed. Do 3-4 sets of stretch and folds spaced 20 minutes apart. If it's still unmanageable, refrigerate for 20 minutes.
Gluten is too tight. Rest the dough ball 30-60 minutes longer at room temperature before stretching. If it came from the fridge, it may need 2-3 hours to relax.
Over-proofed. The yeast ate all its food. Handle gently — it can still make a thin crust. If it tears on contact, turn it into focaccia.
Dead yeast, too-cold environment, or salt killed the yeast. Test your yeast in warm water with sugar — it should foam within 5 minutes.
Weak gluten (low-protein flour or not enough kneading), cold dough, or you're pulling from the center. Let it warm to 20-22°C and stretch from the edges.
Fermentation was too short. Switch to a 24-48 hour cold ferment. Make sure salt is at 2-3% of flour weight.
Too slow building the pizza, wet toppings, or not enough semolina. Use semolina (not flour) and shake-test after each topping.
Over-kneaded, too-high-protein flour without enough water, or fermentation too short. Increase hydration 2-3% and extend the ferment.
Too many wet toppings, oven not hot enough, or baking surface wasn't preheated. Drain mozzarella, preheat your steel or stone for 45-60 minutes.
Sticky pizza dough: causes and fixes
The problem: The dough sticks to your hands, the counter, and the peel. You can't shape it without making a mess.
What's actually happening:
- Your hydration is too high for your flour. Bread flour handles 65-70% hydration well, but all-purpose flour struggles above 63%. Use the pizza dough calculator to dial in exact ratios based on your flour type.
- Under-developed gluten. Dough that hasn't been kneaded or folded enough feels shaggy and sticky because the gluten network hasn't formed properly. Do 3-4 more sets of stretch and folds spaced 20 minutes apart. You can check progress with the windowpane test: if the dough tears instead of stretching thin, it needs more work.
- The dough is too warm. Above 26°C (79°F), dough becomes slack and hard to handle. Use cooler water next time or pop it in the fridge for 20 minutes.
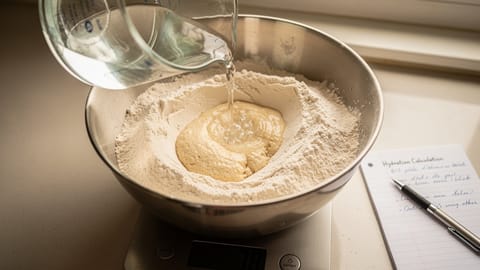
I spent my first six months of pizza making thinking every dough was supposed to be sticky. It wasn't until I started measuring water with a kitchen scale instead of a measuring cup that I realized I was consistently adding 15-20% more water than the recipe called for. A cup of water is always 237ml. A cup of flour can be 120-160g depending on how you scoop. Weigh everything.
Tip: If the dough is already made and too sticky to handle, stop kneading and start folding. Lightly oil your hands instead of adding flour. Drowning sticky dough in flour creates a tough, dry crust.
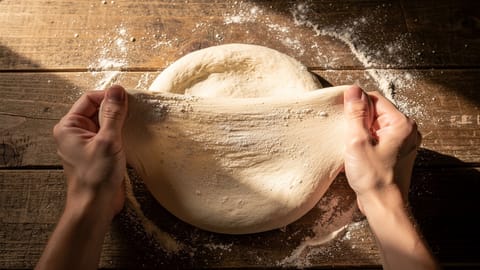
Pizza dough keeps snapping back
The problem: Every time you try to stretch it into a circle, it pulls back like a rubber band.
What's actually happening:
- The gluten is too tight. This usually means the dough ball needs more rest. After balling, wait at least 1-2 hours at room temperature (or 3-4 hours if coming from the fridge) before you even think about stretching.
- The dough is too cold. Cold dough is stiff. It needs to be around 20-22°C (68-72°F) to be extensible. An instant-read thermometer takes the guessing out of this.
- Over-kneading. You've built a super-tight gluten network that doesn't want to move. Walk away for 20-30 minutes and let it relax.
Tip: If your dough is fighting you, walk away. Give it 15 minutes of "timeout" on the counter. The gluten will relax on its own, and you'll find it much easier to stretch when you come back.
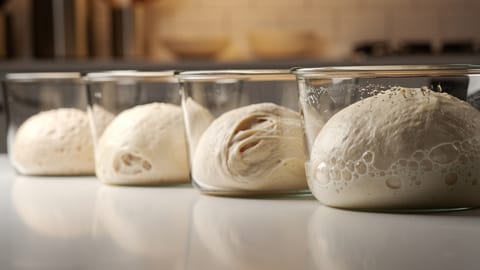
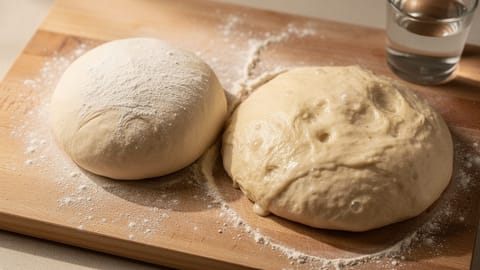
Over-proofed dough: flat, bubbly, and smelling like beer
The problem: The dough is flat, smells like beer or vinegar, and has huge bubbles on the surface. When you touch it, it deflates instantly.
What's actually happening:
- Too much time or heat. The yeast has consumed all the available sugars and produced too much gas and acid. The gluten structure has degraded to the point where it can't hold shape.
- Too much yeast. If you're planning a 48-hour cold ferment, you only need a tiny pinch of yeast (around 0.1% baker's percentage). Using a full packet for a long ferment is the most common cause of over-proofing.
Can you save it? Mildly over-proofed dough can still make a decent thin-crust pizza. Handle it with extreme care: don't degas it. If it smells strongly of alcohol and tears when you look at it, it's better to toss it or repurpose it as focaccia or flatbread.
I've rescued mildly over-proofed dough more times than I'd like to admit. The trick is to stretch it directly on a floured surface rather than trying to pick it up: it's too fragile for the hand-stretch method. Slide it onto the peel with a bench scraper and top it fast.
Under-proofed dough: dense, heavy, and won't rise
The problem: The dough is dense, heavy, and hasn't grown in size. It feels like a brick.
What's actually happening:
- It's too cold. Fermentation slows dramatically below 4°C and nearly stops below 1°C. If your fridge runs very cold, the dough may need 72 hours instead of 24. Or find a warmer spot for the bulk fermentation: inside an oven with just the light on holds around 27-29°C.
- Dead yeast. This is the most common hidden culprit. Test your yeast by whisking it into warm water (27°C / 80°F) with a pinch of sugar. If it doesn't foam within 5 minutes, it's dead. Buy fresh.
- Salt killed the yeast. Never put salt and yeast in direct contact before mixing. Dissolve the salt in the water first, or add it once the flour is partially incorporated.
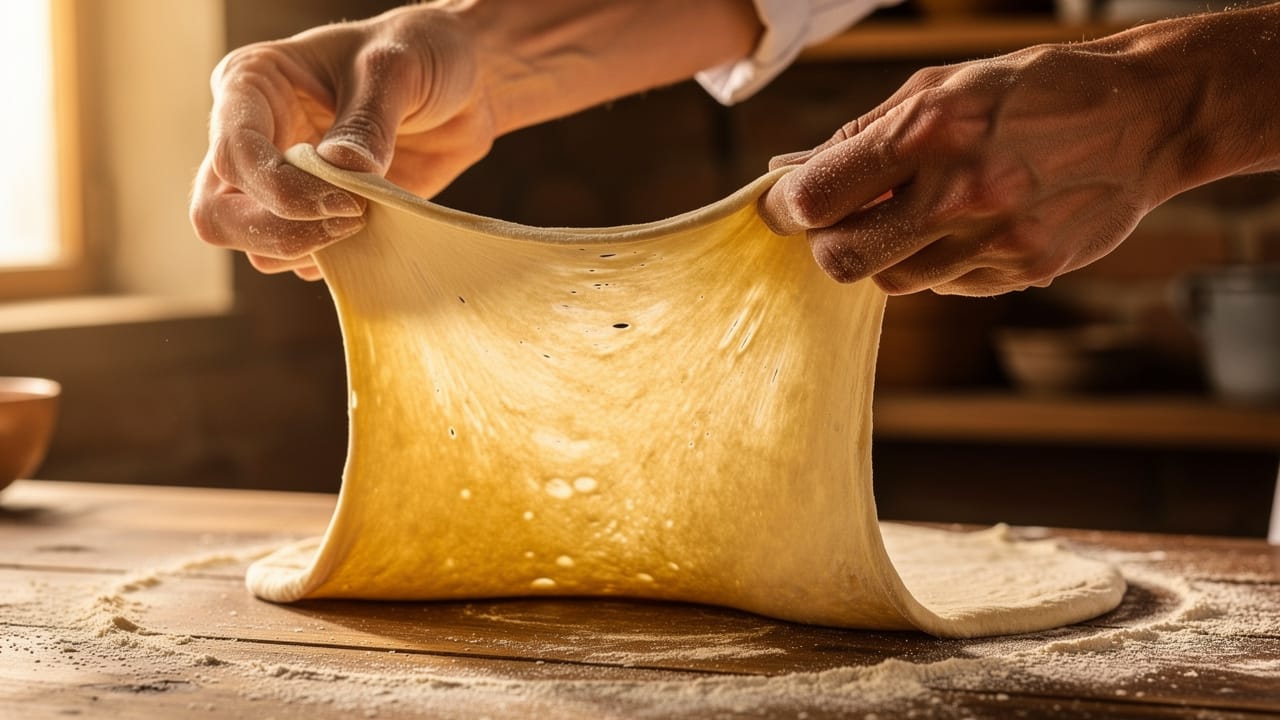
Dough tears when stretching
The problem: You're trying to form a circle and a hole opens up in the middle or along the edges.
What's actually happening:
- Weak gluten. You used a low-protein flour (like basic all-purpose at 10%) or didn't knead long enough. Pizza dough needs flour with at least 11-12% protein. 00 flour or bread flour is the standard.
- Dough is too cold. Cold gluten is rigid and tears instead of stretching. Let it reach 20-22°C (68-72°F) before shaping.
- Uneven technique. You're pulling from the center rather than using the weight of the dough at the edges.
Tip: Use the "steering wheel" method: hold the edge of the dough vertically and let gravity pull the bottom down, rotating it slowly like a steering wheel. This uses gravity to stretch the dough evenly without thin spots. Never use a rolling pin for Neapolitan or NY style: it pushes out all the gas and kills the cornicione.
Bland pizza dough: how to add flavor
The problem: The pizza looks great but tastes like plain white bread.
What's actually happening:
- The ferment was too short. A 2-hour room temperature dough will never taste as good as a 48-hour cold-fermented dough. Time is the secret ingredient. During long fermentation, enzymes break down starches into sugars, and yeast produces organic acids and alcohols that create complex flavors.
- Not enough salt. You need 2-3% salt relative to your flour weight (baker's percentage). Don't eyeball this: use a scale. At 500g flour, the difference between 2% (10g) and 3% (15g) salt is huge.
- No enzymatic activity for browning. If your crust is pale even at high heat, add 0.5% diastatic malt powder. It helps break down starches into sugars, leading to better Maillard browning and a deeper flavor.
The single biggest leap in my pizza flavor came when I moved from a 4-hour room temp rise to a 48-hour cold ferment. Same recipe, same flour, same oven. The crust went from "fine" to genuinely delicious: slightly tangy, complex, with an aroma that filled the kitchen before the pizza even hit the oven.
Pizza won't slide off the peel
The problem: You've built your masterpiece, but it's glued to the peel and won't launch into the oven.
What's actually happening:
- You're too slow. Once the dough is on the peel, the clock is ticking. Moisture from the sauce seeps through in 60-90 seconds.
- Wet toppings. If your mozzarella is sitting in a puddle of whey, your dough will stick. Drain fresh mozzarella on paper towels for 15 minutes before using it.
- Wrong material on the peel. Use semolina or a 50/50 semolina-flour blend on the peel: not just flour. Semolina acts like ball bearings under the dough. A quality wooden peel for launching makes a big difference versus metal.
Tip: Give the peel a "test shake" after every topping you add. If it sticks, lift the edge, blow a little air under it, and throw some semolina under the sticky spot. If the pizza is completely stuck, slide a bench scraper under it to release it.
Tough, chewy crust
The problem: The crust comes out dense, rubbery, and hard to bite through: more like a bagel than a pizza.
What's actually happening:
- Over-kneading. Too much mechanical work (especially in a stand mixer on high speed) builds an extremely tight gluten network. Keep your mixer on the lowest speed, and stop once the dough is smooth and pulls from the bowl sides.
- Too much flour, not enough water. Low hydration creates a stiff dough that bakes into a tough crust. For most home ovens, 62-65% hydration is the sweet spot.
- Fermentation too short. Time doesn't just build flavor: it also relaxes gluten. A well-fermented dough is easier to stretch and bakes into a more tender crust.
- Wrong flour. Very high-protein bread flour (14%+) without enough hydration creates an excessively chewy texture. Either increase water by 2-3% or switch to a flour with 11-13% protein.
Soggy, undercooked center
The problem: The edges are golden but the center is pale, wet, and doughy.
What's actually happening:
- Too many toppings. Overloading creates a moisture barrier that prevents the center from cooking through. Less is more: especially with wet ingredients like fresh tomatoes, mushrooms, or fresh mozzarella.
- Oven not hot enough or surface not preheated. If your baking surface wasn't preheated for at least 45 minutes, the center of the pizza doesn't get enough bottom heat. An infrared thermometer is the only way to know if the surface is actually at temperature.
- Dough too thick in the center. When stretching, make sure you thin out the center: the edges (cornicione) should be puffy, but the base should be thin enough to see light through it for Neapolitan or NY style.
I used to pile toppings high because more seemed better. My center was always soggy. The turning point was making a Margherita with just sauce, torn mozzarella, basil, and a drizzle of oil. The center cooked through perfectly, and the flavor was actually better because each ingredient could be tasted individually.
Burnt bottom, raw top (or vice versa)
The problem: The bottom is charred black but the cheese barely melted, or the top is golden while the bottom is pale.
What's actually happening:
- Burnt bottom, raw top: Your baking surface is too hot relative to the air temperature. This happens when you preheat a pizza steel at max oven temp for too long. Try moving the steel to a higher rack position, or reduce preheat time by 10-15 minutes.
- Raw bottom, cooked top: The opposite: not enough bottom heat. Your stone/steel isn't preheated enough, or you're baking on a regular baking sheet that has no thermal mass. Use a thicker steel or stone, and preheat for a full 45-60 minutes.
New to pizza dough? Start with our beginner pizza dough guide for a foolproof first recipe, or browse all pizza dough guides for more techniques.
Frequently Asked Questions
Sticky pizza dough is usually caused by too much water for your flour type, under-developed gluten, or dough that's too warm. Bread flour handles 65-70% hydration well, but all-purpose flour struggles above 63%. Instead of adding more flour, try doing 3-4 sets of stretch and folds to build gluten structure, or refrigerate the dough for 20 minutes to firm it up.
Over-proofed pizza dough looks flat and deflated, smells strongly of beer or vinegar, and has large, uneven bubbles on the surface. When you poke it, it collapses instantly and doesn't spring back. Mildly over-proofed dough can still make a thin-crust pizza if handled gently. If it tears easily and smells alcoholic, it's too far gone — use it for focaccia instead.
Pizza dough snaps back when the gluten network is too tight and needs more relaxation time. After shaping into balls, wait at least 1-2 hours at room temperature (3-4 hours if coming from the fridge) before stretching. Cold dough is also stiffer — it should be around 20-22°C (68-72°F) to stretch easily. If it's still fighting you, give it 15 more minutes of rest.
Bland crust almost always means the fermentation was too short. A 2-hour room temperature dough can't compete with 24-48 hour cold-fermented dough for flavor. Make sure you're using 2-3% salt relative to flour weight (measured by scale, not eyeballed). For better browning and a subtle sweetness, add 0.5% diastatic malt powder to your recipe.
Tearing during stretching is caused by weak gluten (low-protein flour or insufficient kneading), cold dough, or uneven technique. Use bread flour or 00 flour with 12%+ protein. Let cold dough reach 20-22°C before shaping. Stretch from the edges using the 'steering wheel' method — hold the rim and let gravity pull the dough down, rotating slowly, rather than pulling from the center.
Yes, but it's hard to do by hand — over-kneading is mainly a stand mixer problem. Over-kneaded dough feels extremely tight and elastic, snaps back aggressively, and may even feel warm from friction heat. If this happens, cover the dough and rest it for 30-60 minutes. The gluten will relax on its own. In a mixer, keep it on the lowest speed and stop once the dough is smooth and pulls cleanly from the sides.
For same-day dough with room temperature fermentation, use water around 20-22°C (68-72°F). For cold-fermented doughs that go in the fridge, use cold water around 4-8°C (39-46°F) to slow down yeast activity from the start. Never use hot water above 43°C (110°F) — it kills yeast instantly. The goal is a final dough temperature of 23-25°C after mixing.
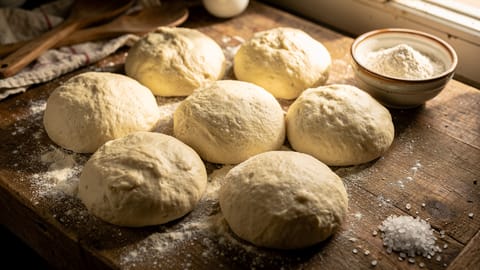
Properly proofed dough should roughly double in volume, feel airy and light, and spring back slowly when you poke it with a finger (leaving a slight indent). If it springs back fast, it needs more time. If the indent stays deep and the dough feels fragile, it's over-proofed. Individual dough balls should look puffy with a smooth, slightly domed surface.
Tough, chewy crust usually means too much gluten development from over-kneading or using very high-protein flour without enough hydration. It can also happen when fermentation is too short, because time breaks down the gluten network slightly, making the dough more extensible. Try increasing hydration by 2-3%, reducing kneading time, or extending your ferment.
After cold fermentation, dough balls need 1-3 hours at room temperature before they're ready to stretch. The exact time depends on the room temperature and how cold the dough is. At 20°C, plan for 2-3 hours. At 25°C, 1-1.5 hours may be enough. The dough is ready when it feels soft and pliable, yields easily when you press it, and doesn't snap back aggressively.
Sources

Cook smarter
Join the waitlist for Fond. Recipes, meal plans, and a little AI sous-chef that learns how you cook.
Related guides
Beginner Pizza Dough
Your first homemade pizza dough, from scratch. A simple same-day recipe with 4 ingredients, plus everything you need to know about mixing, kneading, and shaping.
Neapolitan Pizza Dough
Neapolitan dough the way Naples does it: 00 flour, 60-62% hydration, long fermentation, and extreme heat. This guide follows AVPN standards and adapts them for home ovens, including flour brands, fermentation schedules, and a full troubleshooting section.
Pizza Dough Fermentation: Room Temperature vs Cold Fermentation
Room temp vs. fridge, 4 hours vs. 72 hours, and how to tell when your dough is actually ready. The time-temperature relationship is the single biggest lever for better-tasting pizza.
Pizza dough hydration: complete guide to water ratios
How the water-to-flour ratio shapes your crust. 60% gives you a stiff, easy-to-handle dough; 75%+ gives you open, airy crumb but requires more technique. Includes baker's percentages by style, a decision framework, bassinage technique, and fermentation interaction.
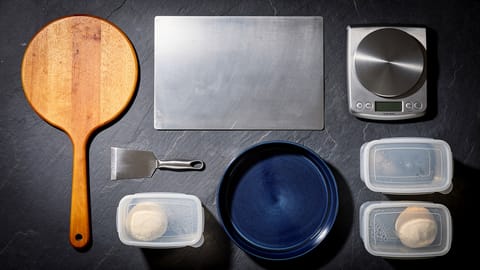
Essential Pizza Equipment: What You Actually Need
Stop wasting money on gadgets. A baking steel, a digital scale, and an infrared thermometer are the upgrades that actually matter. Everything else is a bonus.
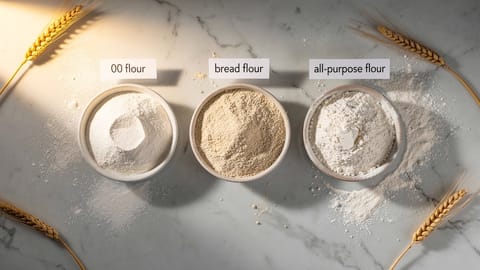
Pizza Flour Guide: 00, Bread Flour, AP & Protein Content
00 vs. bread flour vs. all-purpose: what actually matters is protein content and how it matches your pizza style. Includes W values, brand recommendations, and a style-to-flour matching table.

Gluten Development
The process of building a protein network in dough through kneading, folding, or time, creating the structure that gives bread its chew and allows it to rise.
Hydration (Bread)
The ratio of water to flour in bread dough, expressed as a percentage. Higher hydration means wetter, more open-crumb bread.